Tutorial - File Check-out
19 September 2016
1. Goals
The goal of this tutorial is to understand File Read Operation of Configurable RESTful Web Services.
This operation can be used for checking out file(s) from an object in ENOVIA. In this tutorial the use case is to set up an integration that performs this operation.
2. Use Case Flow
In brief, the flow in this tutorial is the following:
-
Client sends a HTTP request containing necessary information.
-
Web service corresponding to the request is located.
-
The IdLocator is executed. The IdLocator is responsible for locating the object that client is interested in. This is done by using parameters associated in the request.
-
The Operation is executed. The operation is the actual job to perform. For example, check out files from an object.
-
The response is sent back to the client.
3. Configuration for Check-out
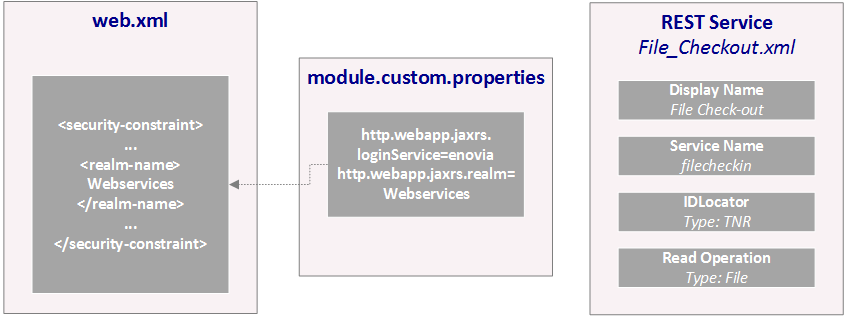
On the TIF server we need to create a XML configuration file for the web service that allows to check out files from an object.
${TIF_ROOT}/modules/enovia/cfg/restservice/File_Checkout.xml
<Rest>
    <DisplayName>File Check-out</DisplayName> (1)
    <ServiceName>filecheckout</ServiceName> (2)
    <IdLocator type="tnr">
        <AllowWildcards>true</AllowWildcards>
    </IdLocator> (3)
    <Read type="file" (4)
          includeFormats="generic" (5)
          includeFileNames="Example*" (6)
          excludeFileNames="*.txt" /> (7)
</Rest>| 1 | User friendly name of the service that is visible in Admin UI. |
| 2 | Unique name of the service that is used by clients to access the service. |
| 3 | Defines how to find the object the client is interested in. In this tutorial we are going to use TNR IdLocator that uses type, name and revision to identify the object. |
| 4 | This web service provides an read operation of type file. |
| 5 | We are interested in files that are in generic format. |
| 6 | We are including files of which names are beginning with "Example". |
| 7 | In this tutorial .txt files are ignored. |
4. Credentials (Optional)
We may also define the credentials that will be used when running the web service.
To do so, within the ${TIF_ROOT}/modules/enovia/etc/module.custom.properties, we need to add the following
http.webapp.jaxrs.loginService=enovia
http.webapp.jaxrs.realm=Webservices
As "loginService" is set to "enovia" it tells TIF to authenticate users against the ENOVIA database.
We have also set "realm" to "WebServices". About realm, see Configurable RESTful Web Services.
Next we need to configure Security Constraints in WEB.XML:
${TIF_ROOT}/modules/enovia/jaxrs/WEB-INF/web.xml
<security-constraint>
    <web-resource-collection>
        <web-resource-name>blocked</web-resource-name>
        <url-pattern>/service/*</url-pattern>
    </web-resource-collection>
    <auth-constraint>
        <role-name>Employee</role-name> (1)
    </auth-constraint>
    <user-data-constraint>
        <transport-guarantee>NONE</transport-guarantee>
    </user-data-constraint>
</security-constraint>
<login-config>
    <auth-method>BASIC</auth-method> (2)
    <realm-name>Webservices</realm-name> (3)
</login-config>| 1 | Value of "role-name" element should point to some ENOVIA role that user must have to use the web services. In this example the role is "Employee". |
| 2 | We are using basic authentication. |
| 3 | Realm name equals with the one that is configured in property "http.webapp.jaxrs.realm". |
Finally, <Credentials> needs to be added to the web service configuration created earlier:
${TIF_ROOT}/modules/enovia/cfg/restservice/File_Checkout.xml
<Rest>
    ...
    <!-- Append the following line -->
    <Credentials containerManaged="true" />
</Rest>
5. Testing Check-out
In this example "Postman" tool (available as a Chrome plugin) is used for testing.
Consider two files has been checked into an object ("Example1.docx" and "Example2.txt").

Figure 2. Files
Use "Send and Download" to check in the file(s).

Figure 3. Check-out of Files
An interesting observation is that only file "Example1.docx" is returned even though we have checked in two files ("Example1.docx" and "Example2.txt"). "Example2.txt" is ignored because we have set "excludeFileNames" to "*.txt" in our web service configuration.
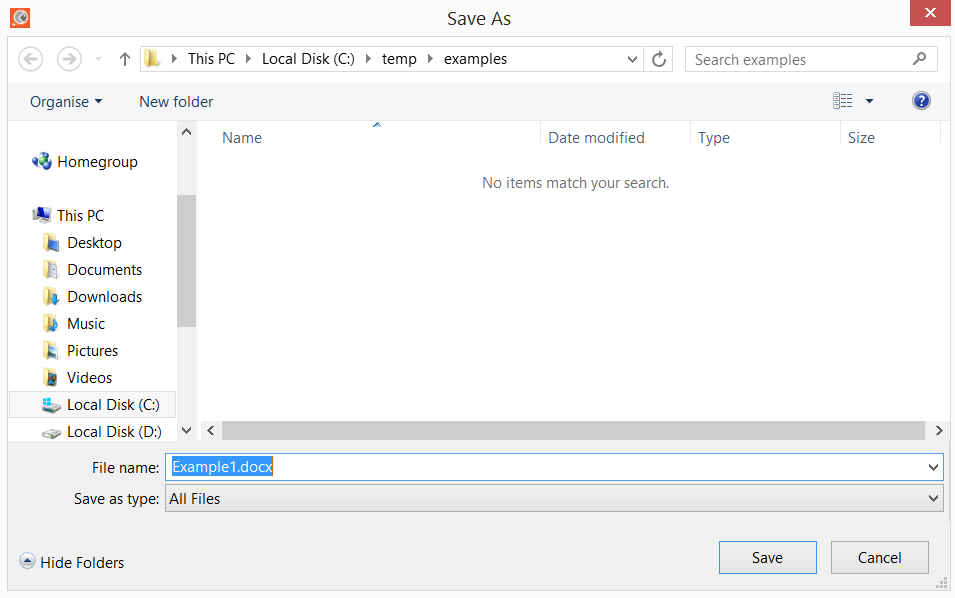
Figure 4. Save File
| Current version of "Postman" tool does not determine file name from response headers. If "Postman" is used for testing, file name must be entered manually in save file dialog. See more details from Issue in GitHub and Discussion in StackOverflow. |
6. Testing Check-out with Request Specific Parameters
Consider we checked in two more files, for example "Example3A.docx" and "Example3B.docx".

Figure 5. More Files Checked in
Lets do another check-out.
As there are more than one files to be returned, the web service generates a zip file containing all files. Since we have configured the web service to include files beginning with "Example", there are three files: "Example1.docx", "Example3A.docx" and "Example3B.docx". "Example2.txt" is ignored like we observed earlier.
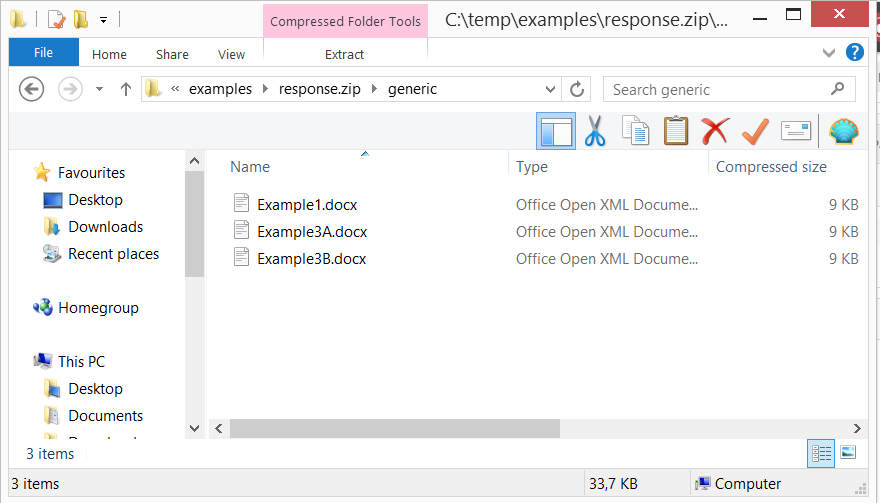
Figure 6. Multiple Files
We may apply some filters to the request using request parameters. Consider we add parameter "includeFileName" with value "Example3*":

Figure 7. Filter Applied
"Example1.docx" is now ignored since it does not match with the wild card in "includeFileName". Thus, the result contains only "Example3A.docx" and "Example3B.docx".
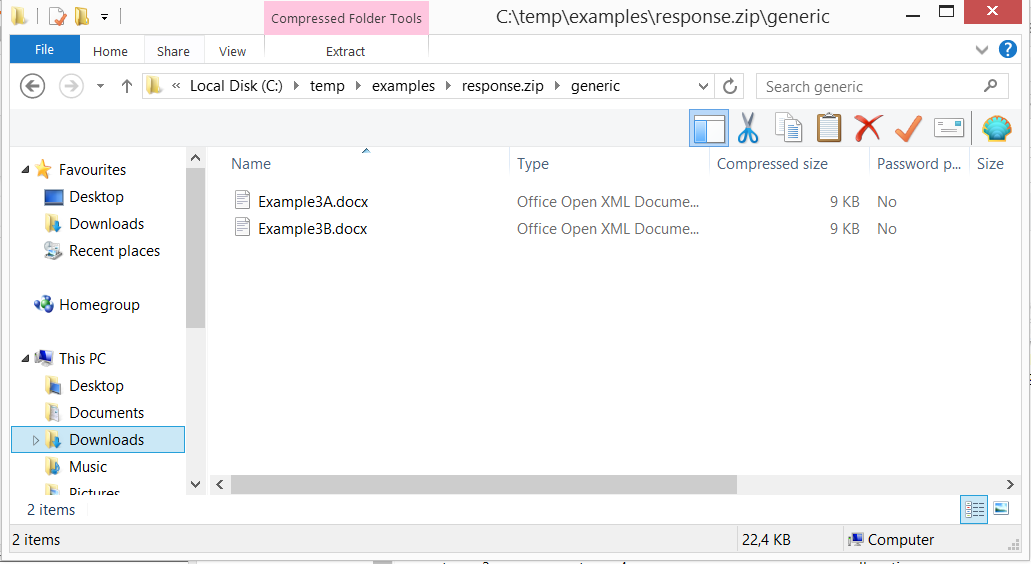
Figure 8. Restricted Set of Files