curl -X POST "http://localhost:8181/enovia/adminapi/v1/auth/login" -H "Content-type: application/json" -d '{"username":"admin","password":"the-password"}'TIF Admin UI
04 June 2019
1. Overview
The Admin UI is bundled with the TIF product. The application is web based and can be used to monitor what currently is happening on the TIF server as well as what has happened in the past.
Default URL to the Admin UI: http://<host>:8181/enovia/adminui.
By default, the port number is 8181, but it can be configured.
The context path may also be configured.
See also this page.
|
You should change the default password. |
Admin UI is accessible on each TIF server instance.
1.1. Supported Browsers
The Admin UI is supported/tested on these (evergreen) browsers
-
Firefox
-
Chrome
-
Microsoft Edge
| The application may work on other browsers too, however, we only support the browsers listed above. |
Regarding Internet Explorer 11 (IE-11): Please consider using another browser such as any in the previous list, since this browser is very old and have poor support for newer web-technologies. If you still insist on using IE-11, you should be aware of that the Admin UI may either not work at all or only work partly. You should also know that the application will not work at all if the "Compatibility mode" is turned on.
1.2. REST API
The Admin UI application is a single page application that communicates with the TIF server via REST endpoints.
These endpoints are documented in this document.
To use the endpoints, you need to authenticate the user to obtain a token. Example:
This will return a token like this:
{
  "token" : {
    "type" : "TIFToken",
    "value" : "7ff81653-71fb-47cd-b1f7-46021896c1d2"
  }
}
For any further call, the above token should be sent in each request:
curl -X GET "http://localhost:8181/enovia/adminapi/v1/..." -H "Authorization: TIFToken 7ff81653-71fb-47cd-b1f7-46021896c1d2"NOTE:
-
If password is wrong, HTTP 401 is returned.
-
Trying to an invalid token returns HTTP 403
-
Logout will revoke the token (or after 24h inactivity)
You can disable the authorization check via a property in module.properties. This should only be used for test or during development.
adminapi.authorization.enabled=false2. Search Indexer
TIF can be integrated with a search indexer; e.g the internal data in TIF is added into an index in order to speed up queries from TIF and reduce the overall load on the TIF server.
Please read this page for details how to enable this.
Once you have configured TIF to utilize a search indexer, you will see some new things in the Admin UI. See image below:

Figure 1. Search
In the top menu, you will have an input field that allows you to execute global queries against the jobs in the search index. The query is made against all data related to the job such as payload content etc.
Secondly, you will have some new functions related to indexing and searching settings.
2.1. Query Mode
The query mode is per default set to "use search engine if available". However, during some period when all data not have been added to the index yet, you may want to query the database instead.
This can be changed from the query mode settings page.

Figure 2. Query Mode Settings
Note that after changing the mode to "Database", the global query will not be available and possible other features as well.
You should toggle this back once your search index is up-to-date with the TIF database.
2.2. Re Indexing
It may happen that your search index is lost or needs to be re-created for one or another reason.
From the TIF Amin UI you can mark jobs that needs to be re-indexed via the "Data Indexer" page as seen below.
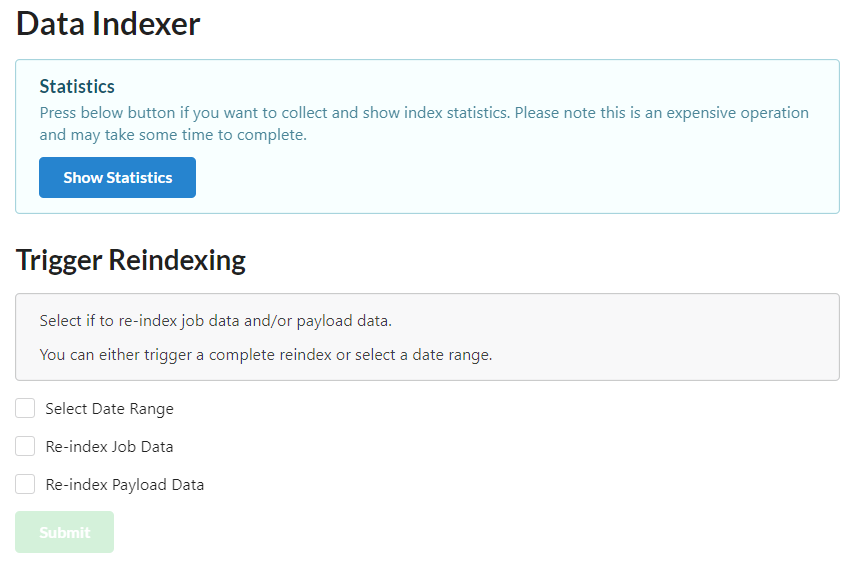
Figure 3. Re-indexing
You can from this page also statistics regarding how much data that is unindexed. To do so, you need to click a separate button that will load this information. That action will take some time in case you have a large database.
Here you select what data (or all) that should be marked for reindexing. You can also specify a date range, e.g. after/before/between.
| The reindexing will take place as soon as the Search Index Synchronizer is triggered the next time. |