public class MyPlugin implements TVCPlugin {
    ...
    public URL getTypeMappingsURL() {
        return getClass().getClassLoader().getResource("com/acme/anapplication/resources/TypeMappings.properties");
    }
    ...
Core
21 March 2016
1. Core
1.1. Domain Objects
1.1.1. Introduction
TVC has a domain object model, e.g. functionality for mapping business objects into Java objects.
To be able to use the Domain Object Model in TVC you need to create a few things, namely.
-
A mapping file, containing the mappings between business types and Java classes
The mapping file is a simple properties file, where each line of this file follows this syntax:
type_SymbolicTypeName=com.company.domain.TheDomainObject
-
Create a plugin, which returns the URL for the mapping file
-
Finally, implement the Domain Objects
An example how the method, which your plugin must implement, is shown in the code example below.
1.1.2. Creating a Domain Object
A type specific Domain Object, must be implemented according to the code example below
import com.technia.tvc.core.TVCException;
import com.technia.tvc.core.db.domain.DomainObject;

public class Part extends DomainObject {

    public Part(String objectId) {
        super(objectId);
    }

    public Part(String type,
                String name,
                String revision,
                String vault) throws TVCException {
        super(type, name, revision, vault);
    }

    // Add your domain object methods here...
}
The base class com.technia.tvc.core.db.domain.DomainObject provides a
large set of methods. Please look into the API for more information.
1.1.3. Instantiating Domain Objects
When obtaining a reference to a domain object, you will need to use any of the static methods with name newInstance(…), as shown below.
DomainObject d == DomainObject.newInstance(objectId);

// or, if you know directly the type:

Part part == (Part) DomainObject.newInstance(objectId);
There are several variants of the newInstance(…) methods, consult the API for details.
As most of the methods in the Domain Object class needs a transactional context available, you should not work with the Domain Objects from JSP pages. Instead, you need to access information from a Domain Object on a JSP page, after the execution of an Action, you should create a so called transfer object. A transfer object can be created as the example below:
import com.technia.tvc.core.db.domain.DomainObject;
import com.technia.tvc.core.db.domain.to.DomainObjectTO;
...

DomainObject d == DomainObject.newInstance(objectId);
...
DomainObjectTO t == d.getTransferObject();
request.setAttribute("object", t);
1.2. Number Generators
1.2.1. Introduction
TVC contains functionality for generating unique numbers (or names), which can be used when for example creating new business objects in the database.
A certain business-type, can have a set of number generators associated.
These numbergenerators are represented themselves by businessobjects of
type TVC Number Generator Settings.
To associate a new number generator to be used for when creating business objects of a certain type, simply add such a number generator by running following MQL/TCL code:
mql add bus                                 \
    "TVC Number Generator Settings"         \
    "type_MyType"                           \
    "A-Size"                                \
    vault "TVC Administration"              \
    policy "TVC Number Generator Settings"  \
    "TVC Number" "0"                        \
    "TVC Digits" "16"                       \
    "TVC Prefix" "A-"                       \
    "TVC Suffix" "-XXX"
This number generator is associated to the type (or any sub-type) registered through the symbolic name: type_MyType. You can either use symbolic names, or real names.
The name of this number generator is A-Size and the number generator
creates numbers according to this format: A-0000000000000001-XXX
Explanation:
When allocating new numbers using a number generator, you can simply do following:
    NumberGenerators ng == NumberGenerators.get(type);
    NumberGenerator gen == ng.getByName("A-Size");
    String number == gen.allocate();
OR:
    NumberGenerators ng == NumberGenerators.get(type);
    NumberGenerator gen == ng.findMostSuitable(1); // 1 == the number of "numbers" to generate
    String number == gen.allocate();
If you want to allocate more than one number, and you know the amount of numbers to be generated, then you can do so by using the following code example.
This approach is much faster than allocating the numbers in a loop, one-by-one.
    NumberGenerator gen == ...
    NumberRange range == gen.allocate(100); // allocate 100 numbers...
    Iterator itr == range.getNumbers();
    while (itr.hasNext()) {
        String number == (String) itr.next();
    }
For additional information, please look at the API docs.
1.3. UI Components
1.3.1. Tag Library
TVC contains a number of so called JSP custom tags, which you can use on your JSP pages.
tvc-core.tld
The table below contains useful tag libs, which are all found in the tvc-core.tld descriptor.
| Name | Attributes | Description |
|---|---|---|
checkLogon |
Checks if the user is logged on, if not, the user is redirected to the login page |
|
aefBase |
Generates a base tag element, which points to the AEF base directory |
|
aefCommonBase |
Generates a base tag element, which points to the common directory of the AEF |
|
tvcBase |
Generates a base tag element, which points to the tvc directory |
|
noCache |
Generates the HTTP headers that prevents caching of page |
|
action |
Generates the URL to an action |
|
absoluteURL |
Generates the URL to an action |
|
scriptEscape |
Can be used to escape the text inside the body content, when using it in Java Scripts |
|
xmlEscape |
Can be used to escape XML characters inside the body content text |
|
queryString |
Writes all request parameters formatted as a query-string to the JspWriter. |
Example code:
<%@ taglib uri="/WEB-INF/tvc-core.tld" prefix="core" %>
<%@ taglib uri="/WEB-INF/tvc-struts-bean.tld" prefix="bean" %>
<core:checkLogon/>
<core:noCache/>
<html>
    <head>
        <core:aefCommonBase/>
        <title><bean:message key='app.title.somePage'/></title>
    </head>
    <body>
        <ul>
            <li><a href="<core:action path='/someAction'/>">Some Action</a></li>
            <li><a href="<core:absoluteURL path='/app/MyPage.jsp'/>">Some JSP page</a></li>
        </ul>
    </body>
</html>
1.3.2. Dialogs
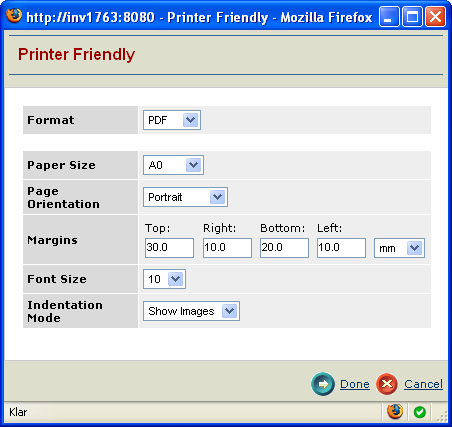
Dialog Pages
Dialog pages, as shown in the image below, are oftenly used in an application. Such a dialog page typically contains some form, which the user fills in, and contains buttons for either cancel or continue/create with the action.
Dialog page example
In many cases, these kind of dialog pages are made by a frameset page holding three frames (top, content, bottom). This means that you need to create four different pages for each dialog page you need. As the amount of dialog pages increases, the number of JSP pages grows fast. The dialog tags simplify the creation of dialog pages.
A template for creating a dialog page, is shown below.
<%@ taglib uri="/WEB-INF/tvc-dialog.tld" prefix="dialog" %>
<%@ taglib uri="/WEB-INF/tvc-core.tld" prefix="core" %>
<%@ include file="../../core/tvcSetContentType.jspf" %>
<core:checkLogon />
<dialog:page windowTitle="..."
             pageHeader="..."
             pageSubheader="">
    <dialog:style>
        ...
    </dialog:style>
    <dialog:script>
        ...
    </dialog:script>
    <dialog:content>
        ...
    </dialog:content>
</dialog:page>
Please note that when you are creating dialog pages with these tags, you should not and do not have to create the standard HTML tags that normally appears in a html document, such as: html, head and body, as these are created automatically by the custom tags.
Tag: <dialog:page>
On the root tag <dialog:page>, you can specify some properties, like the page title, header and sub header. Moreover, there are several attributes, shown in the list below, which can be used to configure the dialog page.
The following list shows additional attributes, which applies to how the buttons at the bottom right of the dialog page is configured.
Tag: <dialog:content>
The body content of this tag will be generated within the <body> tags in the generated HTML code. This is the place where you will put the html code that builds up your user interface.
<dialog:content>
    <table border=0 cellpadding=2 cellspacing=1>
        <tr>
            <td>this is a table in my dialog page...</td>
        </tr>
    </table>
</dialog:script>
You should not add any body tags, and the HTML you add should be valid. Otherwise the dialog page would not display properly.
Tag: <dialog:headContent>
This tag can be used for inserting any kind of data, which should reside inside the <head> tags within the generated HTML.
Example
<dialog:headContent>
    <%@ include file="..include some page here..." %>
</dialog:headContent>
Tag: <dialog:style>
This tag can be used for inserting styling information inline within the html document
The styles are provided within the body content of this tag, example:
<dialog:style>
    tr.odd {
        background-color: #ffffff;
    }

    tr.even {
        background-color: #eeeeee;
    }
</dialog:style>
Tag: <dialog:stylesheet>
This tag can be used for inserting references to a stylesheet file, example:
<dialog:stylesheet href="../app/styles/MyStylesheet.css"/>
Tag: <dialog:script>
This tag can be used for inserting Java Script inline with the generated HTML, or as a references to an external Java Script file, example(s):
<dialog:script href="../app/scripts/MyScript.js"/>
<dialog:script>
    function someFunction() {
        alert("hello world");
    }
</dialog:script>
Advanced: Adding a custom menubar
It is also possible to add a custom menubar into a dialog page. To do so, look at the example below.
<dialog:page ...>
    <core:inlineXmlMenuBar targetFrame="self"
                           maxLabelChars="20"
                           actionHandler="function(a) {eval(a.href.substring(11));}">
        <MenuBar>
            <Menu>
                <Command>
                    <Label><bean:message key='app.label.command0'/></Label>
                    <Href>javascript:command(0);void(0);</Href>
                </Command>
                <Command>
                    <Label><bean:message key='app.label.command1'/></Label>
                    <Href>javascript:command(1);void(0);</Href>
                </Command>
                <Command>
                    <Label><bean:message key='app.label.command2'/></Label>
                    <Href>javascript:command(2);void(0);</Href>
                </Command>
            </Menu>
        </MenuBar>
    </core:inlineXmlMenuBar>
    <dialog:script>
        function command(i) {
            switch(i) {
                case 0:...
                case 1:...
                case 2:...
            }
        }
    </dialog:script>
    <dialog:content>
        ...
    </dialog:content>
</dialog:page>
Dialog Page Example
<%@ taglib uri="/WEB-INF/tvc-dialog.tld" prefix="dialog" %>
<%@ taglib uri="/WEB-INF/tvc-core.tld" prefix="core" %>
<%@ include file="../../core/tvcSetContentType.jspf" %>
<core:checkLogon />
<dialog:page windowTitle="app.title.somePage"
pageHeader="app.pageHeader.somePage"
pageSubheader="">
<dialog:headContent>
<%@ include file="..include some page here..." %>
</dialog:headContent>
<dialog:style>
tr.odd {
background-color: #ffffff;
}
tr.even {
background-color: #eeeeee;
}
</dialog:style>
<dialog:script>
function submitForm() {
// this method is invoked when "continue" is clicked
}
</dialog:script>
<dialog:content>
<FORM ACTION="<core:action path='myAction'/>" METHOD="post">
<TABLE border="0" cellspacing="2" cellpadding="3" width="100%">
<TR>
<TH> </TH>
<TH><bean:message key="app.label.name"/></TH>
</TR>
<logic:iterate indexId="i" id="name" name="names" scope="request" type="java.lang.String">
<TR class="<%== i.intValue() % 2 === 0 ? "odd" : "even" %>">
<TD><INPUT TYPE="radio" NAME="theName" VALUE="<%== name %>" ID="<%== name %>_<%== i %>"></TD>
<TD><LABEL FOR="<%== name %>_<%== i %>"><%== name %></LABEL></TD>
</TR>
</logic:iterate>
</TABLE>
</FORM>
</dialog:content>
</dialog:page>
1.3.3. Tabbed Pages
Pages with tabs, as shown in the image below, are oftenly used in an application. Such page can easily be created using Technia Value Components

Figure 1. Tabbed Pages
Tab Page Example
A tab page can be created in different ways, the code example below illustrates how to use the tab-page taglib to construct the page.
<!DOCTYPE html>
<%@ include file="/tvc/core/tvcSetContentType.jspf" %>
<%@ taglib uri="/WEB-INF/tvc-core.tld" prefix="core" %>
<%@ taglib uri="/WEB-INF/tvc-tabpage.tld" prefix="tabpage"%>
<core:checkLogon />
<core:noCache />
<html>
    <head>
        <core:base/>
        <tabpage:headerResources/>
        <title>Tab Test Page</title>
    </head>
    <body>
        <div>
            This HTML code is shown above the tabs...
        </div>
        <tabpage:tabs>
            <tabpage:tab>
                <tabpage:href>http://www.technia.com</tabpage:href>
                <tabpage:label>Technia</tabpage:label>
            </tabpage:tab>
            <tabpage:tab>
                <tabpage:href>http://www.google.com</tabpage:href>
                <tabpage:label>Google</tabpage:label>
            </tabpage:tab>
            <tabpage:tab>
                <tabpage:href>http://www.yahoo.com</tabpage:href>
                <tabpage:label>Yahoo</tabpage:label>
            </tabpage:tab>
        </tabpage:tabs>
    </body>
</html>
Note: remember to add the JSP tag <tabpage:headerResources/> in the HEAD section of the HTML document, as this tag will add some Java Script and Stylesheet references. The tab page will not work without these.
The tag <tabpage:tab> supports some additional attributes:
Remember the Last Visited Tab
As of TVC 2009.3.0, a new feature were added in order to remember the users last visited tab.
To enable this behaviour, you need to assign the tabs and tab a unique ID, shown below:
<!DOCTYPE html>
<%@ include file="/tvc/core/tvcSetContentType.jspf" %>
<%@ taglib uri="/WEB-INF/tvc-core.tld" prefix="core"%>
<%@ taglib uri="/WEB-INF/tvc-struts-bean.tld" prefix="bean"%>
<%@ taglib uri="/WEB-INF/tvc-struts-logic.tld" prefix="logic"%>
<%@ taglib uri="/WEB-INF/tvc-tabpage.tld" prefix="tabpage"%>
<%@ taglib uri="/WEB-INF/tvx.tld" prefix="tvx"%>
<core:ensureStartedUp/>
<core:noCache/>
<core:checkLogon/>
<html>
    <head>
        <tabpage:headerResources/>
    </head>
    <body>
        <tabpage:tabs tabsId="tvx-home-page">
            <tabpage:tab tabId="collections">
                <tabpage:label><bean:message key="tvx.label.Collections"/></tabpage:label>
                <tabpage:href><core:action path='/showCollections'/>?portalMode=true</tabpage:href>
            </tabpage:tab>
            <tabpage:tab tabId="projects">
                <tabpage:label><bean:message key="tvx.label.Projects"/></tabpage:label>
                <tabpage:href><core:absoluteURL path='/tvx/pmc/Projects.jsp'/></tabpage:href>
            </tabpage:tab>
            <tabpage:tab tabId="my-parts">
                <tabpage:label><bean:message key="tvx.label.MyParts"/></tabpage:label>
                <tabpage:href><core:action path='/execInquiryToTable'/>?inquiry=tvc:inquiry:tvx:misc/MyParts.xml&pageConfig=tvc:pageconfig:tvx:misc/MyParts.xml&portalMode=true</tabpage:href>
            </tabpage:tab>
            <tabpage:tab tabId="my-documents">
                <tabpage:label><bean:message key="tvx.label.MyDocuments"/></tabpage:label>
                <tabpage:href><core:action path='/menuBasedTabPage'/>?menu=tvc:menu:tvx:misc/MyDocsTabs.xml</tabpage:href>
            </tabpage:tab>
        </tabpage:tabs>
    </body>
</html>
This is only required if you render a tab page from a JSP page using the custom tags provided. If you use tabs based upon a menu, as described below, the remembering of the last visited tab is automatically in use.
Tabs Loaded From a Menu
It is possible to load the tabs on a tab-page, using the commands from a defined Menu.
You simply create a URL/command pointing to the ${ROOT_DIR}/tvc-action/menuBasedTabPage, and provide the following parameters:
Example URLs:
-
${ROOT_DIR}/tvc-action/menuBasedTabPage?menu=NameOfMenu
-
${ROOT_DIR}/tvc-action/menuBasedTabPage?menu=NameOfMenu&targetPage=/custom/NameOfPage.jsp
The page that will render the page, will look similar to as:
<!DOCTYPE html>
<%@ include file="/tvc/core/tvcSetContentType.jspf" %>
<%@ taglib uri="/WEB-INF/tvc-core.tld" prefix="core" %>
<%@ taglib uri="/WEB-INF/tvc-tabpage.tld" prefix="tabpage"%>
<core:checkLogon />
<core:noCache />
<html>
    <head>
        <core:base/>
        <tabpage:headerResources/>
        <title>Tab Test Page</title>
    </head>
    <body>
        <div>
            This HTML code is shown above the tabs...
        </div>
        <tabpage:renderTabsFromMenu/>
    </body>
</html>
The JSP tag <tabpage:renderTabsFromMenu/> will render the tabs, based upon the commands within the menu as provided through the URL.
If you don’t use a custom targetPage, a default page is rendered that only will contain the tabs without any information above the tabs.
Dynamic Loading of Menu Based Tab Page
The actual menu being loaded, can be based upon the objectId provided in the request.
For example, you can have one menu for one kind of type, and another for other types. To enable this feature, you need to create a file with name tvc-tabpage.mapping in the folder WEB-INF/classes of the web-application, and configure it as:
<symbolic type name>=<menu name>|<target page name>
Example:
type_Part=tabmenu_Part|/custom/tab/Part.jsp
type_DOCUMENTS=tabmenu_DOCUMENTS|/custom/tab/Documents.jsp
...
The target page that will render the page, will look similar to as:
<!DOCTYPE html>
<%@ include file="/tvc/core/tvcSetContentType.jspf" %>
<%@ taglib uri="/WEB-INF/tvc-core.tld" prefix="core" %>
<%@ taglib uri="/WEB-INF/tvc-tabpage.tld" prefix="tabpage"%>
<core:checkLogon />
<core:noCache />
<html>
    <head>
        <core:base/>
        <tabpage:headerResources/>
        <title>Tab Test Page</title>
    </head>
    <body>
        <div>
            This HTML code is shown above the tabs...
        </div>
        <tabpage:renderTabsFromMenu/>
    </body>
</html>
Multiple Tabs Sections
It is possible to have multiple set of tab-sections on the same page.
Look at the code example below. The important attribute required to set, is the height attribute on the <tabpage:tabs> element itself. The last tab-section doesn’t need this attribute, as the height will be dynamically adjusted based upon the window size.
<!DOCTYPE html>
<%@ include file="/tvc/core/tvcSetContentType.jspf" %>
<%@ taglib uri="/WEB-INF/tvc-core.tld" prefix="core" %>
<%@ taglib uri="/WEB-INF/tvc-tabpage.tld" prefix="tabpage"%>
<core:checkLogon />
<core:noCache />
<html>
    <head>
        <core:base/>
        <tabpage:headerResources/>
        <title>Tab Test Page</title>
    </head>
    <body>
        <div>
            This HTML code is shown above the tabs...
        </div>
        <tabpage:tabs height="400">
            <tabpage:tab load="false">
                <tabpage:href>http://www.technia.com</tabpage:href>
                <tabpage:label>Technia</tabpage:label>
            </tabpage:tab>
            <tabpage:tab>
                <tabpage:href>http://www.google.com</tabpage:href>
                <tabpage:label>Google</tabpage:label>
            </tabpage:tab>
            <tabpage:tab>
                <tabpage:href>http://www.yahoo.com</tabpage:href>
                <tabpage:label>Yahoo</tabpage:label>
            </tabpage:tab>
        </tabpage:tabs>
        <tabpage:tabs>
            <tabpage:tab load="false">
                <tabpage:href>http://www.technia.com</tabpage:href>
                <tabpage:label>Technia</tabpage:label>
            </tabpage:tab>
            <tabpage:tab>
                <tabpage:href>http://www.google.com</tabpage:href>
                <tabpage:label>Google</tabpage:label>
            </tabpage:tab>
            <tabpage:tab>
                <tabpage:href>http://www.yahoo.com</tabpage:href>
                <tabpage:label>Yahoo</tabpage:label>
            </tabpage:tab>
        </tabpage:tabs>
    </body>
</html>
Styling tabs
It is possible to style the layout of individual tabs, by setting a CSS class on them. The below example shows how to write the relevant Setting tag (see the Core Administration Guide for more details).
<Command>
  <Label>...</Label>
  <URL action="...">
    <Param name="..." value="..."/>
  </URL>
  <Setting name="class" value="testCSSclass" />
</Command>
The DOM element receiving the CSS class is the <li> element, which in
turn contains sub-elements (a content div and a link element) which you
might want to target directly with your CSS selectors. Also note that
you might have to apply the !important CSS property for your
customizations to get precedence over the default theme values.
Similarly, for example you might have to remove the background-image
properties before your background-color attribute is honored, and so on.
1.3.4. Calendar
If you need a date picker on a HTML page, you should read this chapter.
Typically, when selecting a date, the shown date should be formatted according to the users locale settings. But the selected date should typically be transferred from the client to the server in a neutral format, like ISO format, for easy parsing.
The Pikaday library is used for selecting the dates. When creating the date picker a number of options are provided. These specify what field to associate the picker with, what should happen when a date is picked and other things. All available options are listed at the Pikaday site.
In order to use the date picker, please look at the following JSP code snippet.
<%@ taglib uri="/WEB-INF/tvc-core.tld" prefix="core" %> (1)
<html>
    <head>
        <core:aefCommonBase/> (2)
        <script type="text/javascript" src="../tvc/core/scripts/jquery.js"></script> (3)
        <link rel="stylesheet" type="text/css" href="../tvc/core/libs/uip-icons/colored/uip-icons-colored.css"/> (4)
        <core:calendarResources/> (5)
    </head>
    <body>
        <form action="<core:absoluteURL path='/tvc/core/tvcDebugRequest.jsp'/>" method="post">
            <input readonly type="text" id="dateField1"> (6)
            <i class="ti-c ti-calendar-c" onclick="editDate()"></i> (7)
            <i class="ti-c ti-delete-c" onclick="clearDate()"></i> (8)
            <input type="submit" value="Submit"/>
        </form>
        <script>
            var calendar;
            $().ready(function() { (9)
                var options = getCalendarOptions('dateField1');
                calendar = new TVCCalendar(options);
            });

            function getCalendarOptions(fieldId) {
                return {
                    field : document.getElementById(fieldId),
                    onSelect : function() {
                        var isoFormatted = this.toString('YYYY-MM-DD');
                        console.log('Date selected', this.getDate(), isoFormatted);
                    }
                };
            }

            function editDate() {
                calendar.show();
                // TVCCalendar.getPicker(getCalendarOptions('dateField1')).show(); (10)
            }

            function clearDate() {
                calendar.clear();
            }
        </script>
    </body>
</html>
| 1 | Include the tvc-core.tld taglibrary |
| 2 | The AEF common base tag is used in this example, as the hrefs to all scripts, images and stylesheets are made relative to this base URL |
| 3 | Include jquery library |
| 4 | Include icons displayed to the right of the date field |
| 5 | Include all calendar specific resources, e.g. Pikaday JS/CSS, locale and more |
| 6 | Field where date is entered |
| 7 | Opens the date picker |
| 8 | Clears the selected date |
| 9 | Initializes the date picker when the page is loaded |
| 10 | Alternate method for getting the picker associated with a field. It lazily initiates the date picker. |
1.3.5. Toolbar
The toolbar implementation in TVC can also be used on a custom JSP page. The example code below illustrates how to do so:
Just copy this code into a JSP page and launch it from your browser.
<%@ include file="/tvc/core/tvcSetContentType.jspf" %>
<%@ taglib uri="/WEB-INF/tvc-core.tld" prefix="core" %>
<%@ taglib uri="/WEB-INF/tvc-struts-bean.tld" prefix="bean" %>
<%@ taglib uri="/WEB-INF/tvc-struts-logic.tld" prefix="logic" %>
<core:checkLogon/>
<html>
<head>
<core:tvcBase/>
<link rel="stylesheet" href="core/styles/tvcMenubar.css" type="text/css">
<script type="text/javascript" src="core/scripts/tvcCommonScript.js"></script>
<script type="text/javascript" src="core/scripts/tvcMenubar.js"></script>
<script type="text/javascript">
    function actionHandler(href) {
        eval(href.href.substring(11));
    }
</script>
<core:inlineXmlMenuBar targetFrame="self"
                       maxLabelChars="40"
                       targetElement="menubarContainer"
                       actionHandler="actionHandler">
    <MenuBar>
        <Menu>
            <Menu>
                <Label>A Menu</Label>
                <Command>
                    <Href>javascript:alert(1);</Href>
                    <Label>First Command</Label>
                </Command>
                <Command>
                    <Href>javascript:alert(2);</Href>
                    <Label>Second Command</Label>
                </Command>
                <Command>
                    <Href>javascript:alert(3);</Href>
                    <Label>Third Command</Label>
                </Command>
                <Command>
                    <Href>javascript:alert(4);</Href>
                    <Label>Fourth Command</Label>
                </Command>
            </Menu>
            <Menu>
                <Label>Another Menu</Label>
                <Command>
                    <Href>javascript:alert(5);</Href>
                    <Label>First Command</Label>
                </Command>
                <Command>
                    <Href>javascript:alert(6);</Href>
                    <Label>Second Command</Label>
                </Command>
                <Command>
                    <Href>javascript:alert(7);</Href>
                    <Label>Third Command</Label>
                </Command>
                <Command>
                    <Href>javascript:alert(8);</Href>
                    <Label>Fourth Command</Label>
                </Command>
            </Menu>
        </Menu>
        <ContextButton>
            <Image>../tvc/core/images/buttons/excelexport.gif</Image>
            <Href>javascript:alert('Excel Export...');</Href>
        </ContextButton>
    </MenuBar>
</core:inlineXmlMenuBar>
</head>
<body>
<div style="width:100%;height:100%;padding:4px;">
<div id="menubarContainer" style="padding-right:10px;"></div>
</div>
</body>
</html>
1.4. Auto Complete
1.4.1. Introduction
The autocomplete feature is intended to make it easier to enter values in fields. This might for example be when specifying what kind of Part the user wants to create (basic), enter the Responsible Design Organization (related object) for a part or select units of measure for a part (ranges).
On server side the AutoCompleteHandler (handler) is responsible for providing available values for a field. The value consist of the actual value that is stored in the database, ex. object id, and a display value which the user is presented with. TVC comes with a number of built-in handlers:
-
type
-
user
-
dataset
-
ranges
-
organization
-
businessobject
Selectize is used on client side to render the field where user can enter values along with the dropdown containing available options. The plugin has a high level of configurability making it possible to set for instance how many options that should be presented, how to render them, ordering of options and much much more. See the Selectize Usage options page for a full list of available settings.
1.4.2. Flow chart
-
User enters a value in the field
-
AJAX request is sent to the server. The request includes the text entered by the user, which AutoCompleteHandler to use and other configuration information.
-
The AJAX service reads the arguments, locates the AutoCompleteHandler and executes the
process()method. -
The AutoCompleteHandler identifies suitable values matching the arguments. Ex. the type handler uses the
TypeInfocache, the businessobject executes a query against the Enovia db. -
Values are sent to the client.
-
Selectize displays the values.
1.4.3. AutoCompleteHandler
The autocomplete handler is responsible to deliver values the user can choose from. There are a number of built-in handlers to support most use cases, for instance selecting types and users. The most flexible handler is the DataSet one which allows you to configure a dataset of objects that the user can choose from.
The autocomplete handlers are configured with a number of settings. Some settings are common across all handlers, e.g. the name and limits of how values to return. Other settings are specific for a handler, e.g. for the type handler you specify the root types to search within.
Built-in AutoComplete Handlers
Common Settings
| Name | Description | Default |
|---|---|---|
name |
Defines the AutoCompleteHandler to use. Enter either the name of a built-in handler or specify the qualified name of your java class. |
user |
caseSensitive |
Should searches be case sensitive. |
false |
contains |
Must the search criteria match the value exactly. |
true |
limit |
Maximum amount of results that is returned from server. |
10 |
localize |
true |
User
Settings
| Name | Description | Default |
|---|---|---|
assignments |
Users must be assigned the role/group to be displayed. |
<none> |
returnOid |
Returns object id instead of user name as value for the users. |
false |
Type
Settings
| Name | Description | Default |
|---|---|---|
rootTypes |
Defines types to be included in the search. All sub types are returned as well |
All types |
returnAbstractTypes |
Defines if abstract types should be returned. |
false |
DataSet
Uses a dataset to define available search options. If the field is in context of an object, e.g. in a top panel, the object id will be available to the dataset making it possible to do dataset operations that requires input. That can for example be an expansion.
| Name | Description | Default |
|---|---|---|
dataset |
Name of the dataset to use, ex.tvc:dataset:tvx:enc/MyParts.xmlThis field is required. |
|
value |
Select expression selecting the value. |
id |
label |
Defines what data to display in value. Use macros to define it. Examples:
label : $<attribute[attribute_MarketingName]> ($<name>) |
$<name> |
select |
Defines addtional data to fetch and return to the UI. Define it by adding one or more select expressions. Examples:
select : ['id', 'description', '$<attribute[attribute_MarketingName>'] The selected data can be used to make more advanced option rendering at client using the Selectize settings rendering options. |
Example configuration in TVC Forms to specify Part Family for a Part:
<ConnectField>
    <Label>Part Family</Label>
    <Relationship>
        <Name>relationship_ClassifiedItem</Name>
        <Direction>to</Direction>
    </Relationship>
    <SearchForm>tvc:searchconfig:tvx:enc/AddToPartFamily.xml</SearchForm>
    <AutoComplete>true</AutoComplete>
    <AutoCompleteHandler>dataset</AutoCompleteHandler>
    <AutoCompleteSettings><![CDATA[{
            handler : {
                dataset : 'tvc:dataset:tvx:enc/PartFamilies.xml',
                value : 'id',
                label : '$<name>'
            }
        }]]></AutoCompleteSettings>
</ConnectField>
Example configuration in TVC Forms which selects additional data and has custom rendering:
<ConnectField>
    <Label>ECO to release</Label>
    <Relationship>
        <Name>relationship_AffectedItem</Name>
        <Direction>to</Direction>
    </Relationship>
    <SearchForm>tvc:searchconfig:tvx:enc/AddToECO.xml</SearchForm>
    <AutoComplete>true</AutoComplete>
    <AutoCompleteHandler>dataset</AutoCompleteHandler>
    <AutoCompleteSettings><![CDATA[{
            handler : {
                dataset : 'tvc:dataset:tvx:enc/ECOs.xml',
                value : 'id',
                select : ['$<name>', '$<attribute[attribute_Severity]>', '$<attribute[attribute_Priority]>']
            },
            labelField : 'name',
            searchField : ['name', 'select_2', 'select_3'],
            render : {
                option : function(item, escape) {
                    var option = [];
                    option.push('<div style="border-bottom: 1px solid #ccc;">');
                    option.push(escape(item.name) + "<br/><b>Severity:</b> " + escape(item.select_2) + "<br/><b>Priority:</b> "+ escape(item.select_3));
                    option.push('</div>');
                    return option.join('');
                }
            }
        }]]></AutoCompleteSettings>
</ConnectField>
Note that the select statements are replaced with select_1, select_2 and so on. This is done because complex select statement doesn’t comply with JSON naming conventions.
BusinessObject
Searches for business objects using a query. Most often you enter some criteria to limit the search result, for example you will add a typePattern and whereClause to only get the first revision of parts.
Settings
| Name | Description | Default |
|---|---|---|
typePattern |
Type pattern to search for |
|
namePattern |
Name pattern to search for |
|
revisionPattern |
Revision pattern to search for |
|
vaultPattern |
Vault pattern to search for |
|
whereClause |
Where clause to use |
|
matchOn |
||
expandType |
true |
|
displayMacro |
||
searchType |
How the search criteria will operator. Available values:containsstartsWithendsWith |
Path Object
Searches for Path objects using a path query. Most often you enter some criteria to limit the search result, for example you will add a Path Type, selectable and whereClause to get the path owner.
Settings
| Name | Description | Default |
|---|---|---|
PathType |
Type of Path to search for |
|
PathSelect |
expression to get the respective id |
id |
QueryKind |
how the query will operate on subpath |
containsany |
vault |
Vault to search for |
|
where |
Where clause to use |
|
ElementInquiry |
name of the inquiry to the elements for query |
1.4.4. Settings
There are two categories of settings:
-
Selectize. These controls the behavior of the Selectize plugin. See the Selectize usage page for a full reference.
-
AutoCompleteHandler. Defines which handler to use and other configurations related to it. Handler settings are wrapped in a handler object to don’t collide with Selectize settings. These settings are described in detail in the previous chapter.
Example intializing AutoComplete with the type handler for a field with id my-autocomplete-field.
var settings = {
    // Settings from Selectize
    maxItems : 5,
    delimiter : ',',
    onChange : function() {
        console.log("AutoCmplete Values", this.getValue());
    },

    // Settings passed to AutoCompleteHandler
    handler : {
        name : 'type',
        rootTypes : ['type_Part', 'type_DOCUMENTS']
    }
};
$('#my-autocomplete-field').tvcselectize(settings);
Example populating a hidden field when values are changed
var settings = {
    delimiter : ',',
    onChange : function() {
        $('#my-hidden-field').val(this.getValue());
    },

    // Settings passed to AutoCompleteHandler
    handler : {
        name : 'user'
    }
};
$('#my-autocomplete-field').tvcselectize(settings);
Custom rendering of options
It’s possible to get complete control of how the options are rendered by supplying a javascript function in the settings.The function is called once for each option to render and all data passed from the server is available to use. This feature plays well in combination with the dataset handler which allows you to select additional data.
Custom rendering of options using dataset handler
var settings = {
    handler : {
        name : 'dataset',
        value : 'id',
        select : ['name', '$<attribute[attribute_MarketingName>']
    },
    render : {
        option : function(item, escape) {
            var option = [];
            option.push('<div>');
            option.push(escape(item.name) + " : " + escape(item.select_1]));
            option.push('</div>');
            return option.join('');
        }
    },
    searchField : ['name', 'select_1']
}
Filtering of what options to display is done at both server and client
side (both must think it’s a suitable option in order to the option to
appear). By default Selectize is configured to search the label but in
cases when custom rendering is used you need to specify what data to
search on. This is done with the the setting searchField.
If the select statement contains special characters the returned value
will be returned with a key on with the format select_n where n is the
index of the select statement.
1.4.5. Structure Browser Tables
On the table column you can specify if you wish to use autocomplete by
setting the columntype to autocomplete. Specify which handler to use
with the element AutoCompleteHandler.
Example using autocomplete to specify the owner
<Column xmlns="http://technia.com/TVC/Table" xmlns:xsi="http://www.w3.org/2001/XMLSchema-instance"
    xsi:schemaLocation="http://technia.com/TVC/Table http://products.technia.com/tvc/schema/latest/TableColumn.xsd">
    <Name>owner</Name>
    <Label>Owner</Label>
    <Expression>owner</Expression>
    <ColumnType>autocomplete</ColumnType>
    <AutoCompleteHandler>user</AutoCompleteHandler>
</Column>
Custom settings for Selectize and handler can be specified using the
element AutoCompleteSettings. See previous chapter on available
settings.
Example with custom settings
<Column xmlns="http://technia.com/TVC/Table" xmlns:xsi="http://www.w3.org/2001/XMLSchema-instance"
    xsi:schemaLocation="http://technia.com/TVC/Table http://products.technia.com/tvc/schema/latest/TableColumn.xsd">
    <Name>owner</Name>
    <Label>Owner</Label>
    <Expression>owner</Expression>
    <ColumnType>autocomplete</ColumnType>
    <AutoCompleteHandler>user</AutoCompleteHandler>
    <AutoCompleteSettings>{
        maxItems : 1,
        delimiter : ','
    }</AutoCompleteSettings>
</Column>
Structure Browser tables only supports selecting one item (setting maxItems).
Column type: relatedobject
By default this column types has autocomplete support. Specify an
AutoCompleteHandler which supplies available values.
Using the organization handler to supply available values
<Column xmlns="http://technia.com/TVC/Table" xmlns:xsi="http://www.w3.org/2001/XMLSchema-instance"
    xsi:schemaLocation="http://technia.com/TVC/Table http://products.technia.com/tvc/schema/latest/TableColumn.xsd">
    <Name>design_organization</Name>
    <Label>RDO</Label>
    <Editable>true</Editable>
    <Setting name="Relationship" value="relationship_DesignResponsibility" />
    <Setting name="Direction" value="to" />
    <Setting name="Select" value="name" />
    <MatchRangeOnObjectId>true</MatchRangeOnObjectId>
    <ColumnType>relatedobject</ColumnType>
    <AutoCompleteHandler>organization</Setting>
    <AutoCompleteSettings>{ maxItems : 1 }</Setting>
</Column>
Using ranges for table cell as available values
<Column xmlns="http://technia.com/TVC/Table" xmlns:xsi="http://www.w3.org/2001/XMLSchema-instance"
    xsi:schemaLocation="http://technia.com/TVC/Table http://products.technia.com/tvc/schema/latest/TableColumn.xsd">
    <Name>design_organization</Name>
    <Label>RDO</Label>
    <Editable>true</Editable>
    <Setting name="Relationship" value="relationship_DesignResponsibility" />
    <Setting name="Direction" value="to" />
    <Setting name="Select" value="name" />
    <MatchRangeOnObjectId>true</MatchRangeOnObjectId>
    <ColumnType>relatedobject</ColumnType>
    <AutoCompleteHandler>ranges</Setting>
    <AutoCompleteSettings>{ maxItems : 1 }</Setting>
    <RangeHandlerClass><![CDATA[dataset:tvc:dataset:tvx:enc/Organizations.xml|$<name> : $<revision>]]></RangeHandlerClass>
</Column>
1.4.6. Top Panel
Configuring a field where users can specify types. Note that only types deriving from Part can be selected
<Field>
    <Label>Type:</Label>
    <Expression><![CDATA[$<type>]]></Expression>
    <Editable>true</Editable>
    <AutoCompleteHandler>type</AutoCompleteHandler>
    <AutoCompleteSettings>{handler : { rootTypes : 'type_Part' }}</AutoCompleteSettings>
</Field>
Field with ranges, in this case Unit of Measure
<Field>
<Label>emxEngineeringCentral.Part.UnitOfMeasure</Label>
<Expression>$<attribute[attribute_UnitofMeasure]></Expression>
<Editable>true</Editable>
<AutoCompleteHandler>ranges</AutoCompleteHandler>
<Settings>
<RegisteredSuite>EngineeringCentral</RegisteredSuite>
</Settings>
</Field>
Field using organization handler to set design organization
<Field>
    <Label>Design Organization:</Label>
    <Editable>true</Editable>
    <DataHandler>com.technia.tvc.core.gui.toppanel.form.builtin.RelatedObjectHandler</DataHandler>
    <FieldCellRenderer>com.technia.tvc.core.gui.toppanel.form.builtin.RelatedObjectRenderer</FieldCellRenderer>
    <AutoCompleteHandler>organization</AutoCompleteHandler>
    <Settings>
        <Setting name="Relationship">relationship_DesignResponsibility</Setting>
        <Setting name="Direction">to</Setting>
        <Setting name="Display Property">name</Setting>
        <Setting name="Show Type Icon">true</Setting>
        <Setting name="Show Link">true</Setting>
    </Settings>
</Field>
1.4.7. Forms
Configuring a field where users can specify types.
<TypeField>
    <Label>Type</Label>
    <DefaultValue>type_Part</DefaultValue>
    <TypePattern>type_Part</TypePattern>
    <TypePattern>type_DocumentationIssue</TypePattern>
    <TypePattern>type_HardwareIssue</TypePattern>
    <TypePattern>type_SoftwareIssue</TypePattern>
</TypeField>
Advanced example selecting additional data and custom rendering
<ConnectField>
    <Label>ECO to release</Label>
    <Relationship>
        <Name>relationship_AffectedItem</Name>
        <Direction>to</Direction>
    </Relationship>
    <SearchForm>tvc:searchconfig:tvx:enc/AddToECO.xml</SearchForm>
    <AutoComplete>true</AutoComplete>
    <AutoCompleteHandler>dataset</AutoCompleteHandler>
    <AutoCompleteSettings><![CDATA[{
           handler : {
              dataset : 'tvc:dataset:tvx:enc/ECOs.xml',
              value : 'id',
              select : ['$<name>','$<attribute[attribute_Severity]>','$<attribute[attribute_Priority]>']
           },
           labelField : 'name',
           searchField : ['name','select_2','select_3'],
           render : {
              option : function(item, escape) {
                 var option = [];
                 option.push('<div style="border-bottom:1px solid #ccc;">');
                 option.push(escape(item.name) + "<br/><b>Severity:</b> " + escape(item.select_2) + "<br/><b>Priority:</b>"+ escape(item.select_3));
                 option.push('</div>');
                 return option.join('');
              }
       }
    }]]></AutoCompleteSettings>
</ConnectField>
1.4.8. Live Examples
TVC comes bundled with examples to get a feel what the autocomplete can
accomplish. It is reached through
<app-name>/tvc/core/tvcAutoCompleteTest.jsp.
1.4.9. Custom AutoCompleteHandler
Create a custom autocomplete handler in case any of the built-it doesn’t
meet your requirements. The java class must extend
com.technia.tvc.core.gui.autocomplete.AutoCompleteHandler.The process
method in your class is invoked each time a search is performed. A
context object is passed to the method form which you can read the query
entered by the user, context object id, arguments and other things. The
method returns a Result object which contains the with the options the
user can choose from.
Example
public class ExampleHandler extends AutoCompleteHandler {
    @Override
    public Result process(Context ctx) throws TVCException {
        Result result = new Result(ctx);
        final Random r = new Random();
        final int max = 100;
        for (int i = 0; i < max; i++) {
            int value = r.nextInt(max);
            if (result.filter("Value " + value, "Text " + value)) {
                break;
            }
        }
        return result;
    }
}
1.5. Running TVC From a Standalone Application
It is possible to create a standalone Java class, that is using TVC. The
simplest approach is to extend
the com.technia.tvc.core.util.cmdline.TVCCmdlineClient as this class
will handle the basics, such as establishing context, initializing TVC
etc.
Simply create a Java class as the example below illustrates. The start method is invoked from the main method, and after the initialization, the performmethod is invoked.
package com.acme;

import com.technia.tvc.core.util.cmdline.TVCCmdlineClient;
import com.technia.tvc.core.db.MQLUtils;

public class Test extends TVCCmdlineClient {
    public Test() {
    }

    public static void main(String args[]) {
        new Test().start(args);
    }

    protected int perform(String args[]) throws Exception {
        /*
         * Prints the matrix version to the console...
         */
        System.out.println(MQLUtils.mql("version"));
    }
}
In order to execute such a class, you will need to have at least the eMatrixServletRMI.jar, the tvc-core-*.jar and the tvc.license file within the classpath. You might also need some other resources, depending on the need you have.
The below (Windows) batch script illustrates how to invoke the class. Note about the arguments required to pass on the command line, in order to establish the context and initialization of TVC.
set CP=.;eMatrixServletRMI.jar;tvc-core-6.3.0.jar
set class="com".acme.Test
java -classpath %CP% %CLASS% -host=rmi://127.0.0.1:10800 -user=creator -pass=xyz
Following arguments can be defined:
The batch script above assumes that you have both the tvc.license file as well as the required JAR files within the current directory.
1.5.1. Call JPO From a Standalone Application
If you need to invoke a JPO from a command line application, this can simply be done as the example below illustrates.
set CP=.;eMatrixServletRMI.jar;tvc-core-6.3.0.jar
set class="com".technia.tvc.core.util.cmdline.JPOExecutor
set JPO_NAME=My JPO
set JPO_METHOD=mxMain
java -classpath %CP% %CLASS% -host=rmi://127.0.0.1:10800 -user=creator -pass=xyz "-jpo=%JPO_NAME%" -method=%METHOD%
1.5.2. Execute a MQL Statement From a Standalone Application
If you need to execute a single MQL statement from a command line application, this can simply be done as the example below illustrates.
set CP=.;eMatrixServletRMI.jar;tvc-core-6.3.0.jar
set class="com".technia.tvc.core.util.cmdline.RunMQL
set MQL=list vault
java -classpath %CP% %CLASS% -host=rmi://127.0.0.1:10800 -user=creator -pass=xyz "-mql=%MQL%"