File Manager - Administration Guide : User Interface
21 March 2016
1. User Interface
This chapter will describe how the user interfaces for both the client application and the HTML pages that are used to interact with the TVC File Manager client. Note: If you are using Info Central, the HTML user interface looks slightly different.
1.1. HTML User Interface
The TVC File Manager is integrated to the standard ENOVIA™ pages related to documents, through the manipulation of the JPO’s that generates the links to manage the document files. Note that if you use the TVC Structure Brower, you should take a look into this chapter for more possibilities.
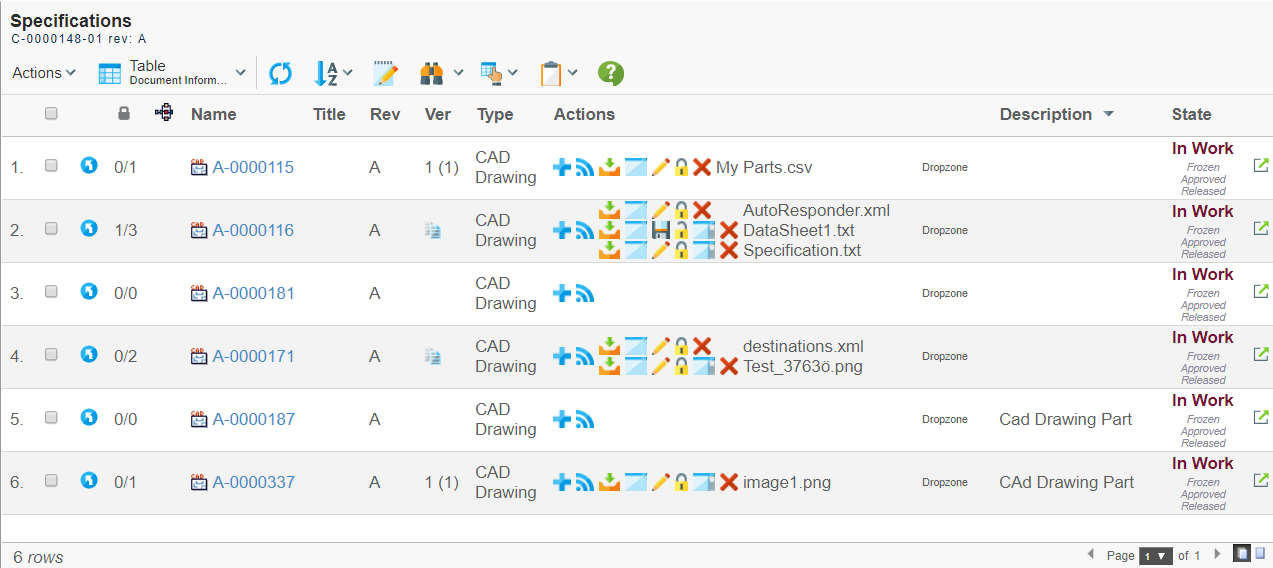
Figure 1. Example of a document table page is shown with the TVC File Manager enabled.
All the links for those objects, which type is a managed type by the TVC File Manager, will have its links replaced to work together with the TVC File Manager client.
The images for those links have the same meaning as previously, e.g. download, view, check-in, update, check-in new, lock and unlock. See the table below:
| Icon | Description | Tooltip |
|---|---|---|

|
Link for adding new files into the document object. |
Add |

|
Link for adding a subscription on the object. |
Subscribe |

|
Link for downloading a file. |
Download |

|
Link for viewing a file. |
Open |

|
Link for update the file, i.e. check-in a new version. |
Save |

|
Link for checking-out a file. |
Edit |

|
Link for locking the document object holding the file. |
Lock |

|
Link for un-locking the document object holding the file. |
Unlock |

|
Link for preview a file. *Only available when used within a structure browser table. |
Preview |

|
Link for deleting the version object |
Delete |
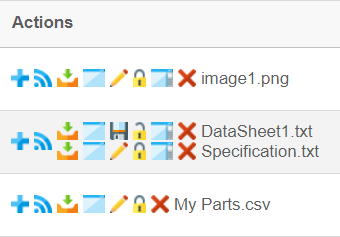
One behavior change compared to the OOTB behavior is that, if one document object has multiple files checked in – then each file will have separate actions. E.g. the OOTB behavior would just have one set of button for a document object, and if there are multiple files checked-in, you would get a ZIP archive containing all files when downloading (or checking-out) the files. Since the TVC File Manager is supposed to work on one file at a time, this behavior was needed to change. E.g. each file has its own set of action buttons.
Also, It is possible to reverse the lock icon to match the file lock status. Ex. When the file is locked, show the lock icon and similarly, when the file is unlocked, show the unlock icon.
Use the below global property in tvc.properties to reverse the lock icon.
| Property | Description | Default Value |
|---|---|---|
tvc.core.fileActions.reverseLockIcon |
Reverse the lock icon |
false |
1.1.1. Reducing the Amount of Available Actions
The actions shown in the table are all visible depending on the actual access rights the current user has to the document object. However, in some situations, you might want to reduce the amount of available actions; for example just providing a view and/or download link. This might be the case if you want to show the document actions within a search result page for example.
There are a couple of Settings that could be applied to the actions column, in order to reduce the visible actions.
The following table lists those settings:
| Setting Name | Description |
|---|---|
Show Subscription |
Defines if the subscription link should be visible or not |
Show Checkin |
Defines if the check-in new file action should be visible or not |
Show Download |
Defines if the download file action should be visible or not |
Show View |
Defines if the view file action should be visible or not |
Show Checkout |
Defines if the check-out file action should be visible or not |
Show Update |
Defines if the update action should be visible or not |
Show Lock |
Defines if the lock action should be visible or not |
Show Unlock |
Defines if the unlock action should be visible or not |
Show Delete Version |
Defines if the delete version action should be visible or not |
Show Preview |
Defines if the preview action should be visible or not |
All of these settings accept a Boolean value. The default value for all of them is true.
| These settings will not give the user more access than s/he actually has to the document object. I.e. even though the "Show Checkout" setting is set to true, the user must have access to perform this action in order to do a checkout. |
1.1.2. Configuring the File Actions Column
The column showing the file actions can be configured.
For example, you can define if the name of the file should appear only when there are multiple files attached or if they always should be present. The position of the filename could be displayed either on the left or right side of the actions. Moreover, the file name could be truncated to only show a certain amount of characters.
All of these options can be configured via system parameters, which affects all tables showing the actions column. The table below shows these parameters
| Name | Description | Default Value |
|---|---|---|
tvc.office.ui.fileNames.alwaysShowInTable |
Whether or not to always show the file name. If set to false, the filename is only shown in case there are multiple files. |
True |
tvc.office.ui.showFileNamesOnRightSide |
Defines if the filename is on the right hand or the left hand side. |
True |
tvc.office.ui.fileNames.maxLengthInTable |
Defines the maximum length of the filename. |
-1 (no truncation will be made) |
tvc.office.ui.neverShowSubscriptionLink |
Whether or not the subscription link should be disabled |
False |
tvc.office.ui.showAllFilesForNonManagedTypes |
Whether or not to display all files for those document objects that normally aren’t managed by TVC. |
False |
tvc.office.ui.showDeleteVersion |
Whether or not to display the delete version icon by default. |
True |
The system parameters mentioned above, are typically defined in the "web.xml" file, and will affect all tables showing the file actions column.
However, to apply a different behavior to a certain table; you are able to define that by using settings on the column in that table. The following table shows the settings that can be used to apply table specific behavior.
| Table Column Setting Name | Default Value |
|---|---|
Always Show File Name |
According to system setting |
Show Filename On Right Side |
According to system setting |
Filename Length |
According to system setting |
Default Preview Suffixes |
pdf,gif,png,jpg,jpeg,txt,bmp |
To display the actions column in tvc table, you can use this column definition:
<Column>
    <Label>Actions</Label>
    <ColumnType>actions</ColumnType>
    <Setting name="Show Checkin" value="false"/>
    <Setting name="Always Show File Name" value="true" />
</Column>
To display the actions field in tvc TopPanel, you can use this field definition:
<Field>
    <Label>Actions:</Label>
    <DataHandler>com.technia.tvc.office.ui.datahandler.MainObjectActionsHandler</DataHandler>
    <Settings>
        <Setting name="Show Checkin" value="false"/>
        <Setting name="Always Show File Name" value="false"/>
    </Settings>
</Field>
1.2. The version column
The version column ("Ver") comes with some configuration options as well. The column is defined in XML inside a table element, as usual, and the ColumnType is set to "version". The below sample column configuration might be of help:
<Column>
    <ColumnType>version</ColumnType>
    <Label>emxComponents.Common.Version</Label>
    <RegisteredSuite>Components</RegisteredSuite>
    <Setting name="ShowLatestVersion">true</Setting>
</Column>
The setting called "ShowLatestVersion" defines whether or not you want the version column to display both the active version number and the latest revision number of the document. The setting defaults to true, showing both values, in the format <active> (<latest>). However, as these two often are the same, the latter can be hidden by defining this setting as false.
1.3. Integration User Interface
| If you use a browser that only supports the HTML5 UI, the information in this chapter is not valid. |
The user interface of the integration looks like the example below. Each file that has been downloaded has an entry, and depending on if the document were downloaded, viewed or checked out – the entry has different kind of functionality associated. For example, if checking-out a document, the associated application is launched – and while the user is editing the document, the status of the entry is "Editing". Once the user has finished editing the document, he/she can click the "Check-In" button to transfer the new version back to the server. If the user selects "Cancel", the document object is unlocked and no new version is sent back to the server.
You may also right click on an entry to open a context menu. The context menu contains a few more actions besides those that are immediately visible in the entry itself. Such as "Properties" that opens the object from which the file was downloaded in a popup window.
In case the file was downloaded or viewed, the entry has a link for viewing the file. Also, an entry could be removed from the list, by simply clicking the "Remove" link, or using the "broom" to remove all inactive entries (i.e., entries that are in being downloaded or uploaded or in the "Editing" state will not be removed).
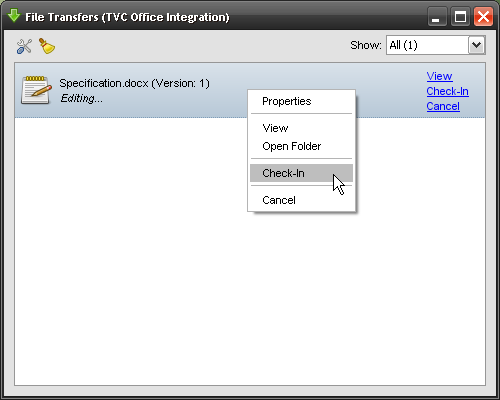
Figure 2. Integration user interface
The integration interface is brought up when the user performs an action against the document – but the window can also be opened up through a command in the "Tools" menu in the top-toolbar (as shown below).
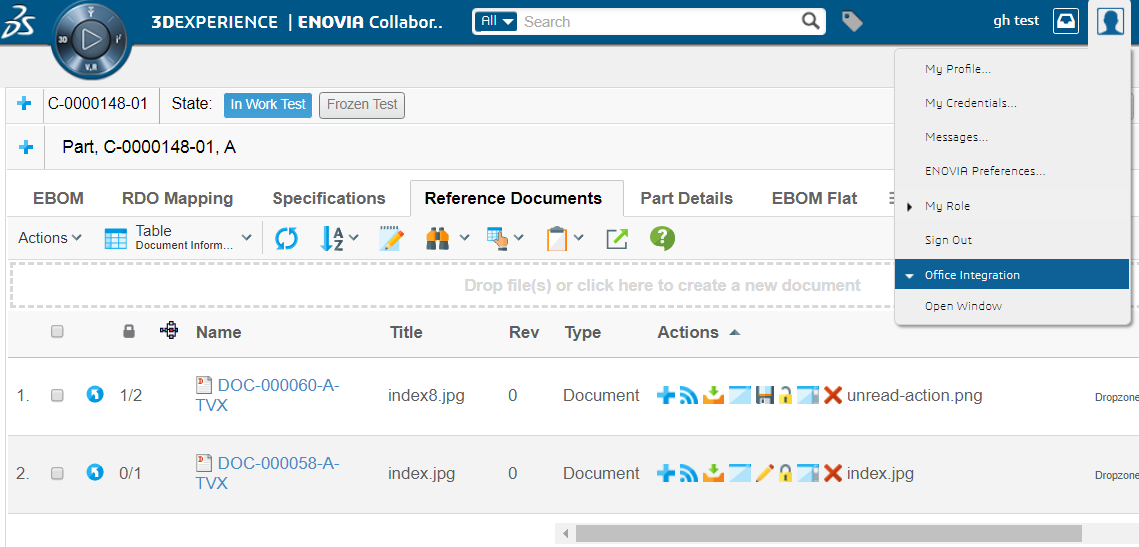
Figure 3. Link for Opening the TVC File Manager
Once the user has finalized the editing of the document, and closed the application. The file manager window popup again, and the user can then click the "Done" link in order to send back the new version. The example below illustrates how this might look like, when uploading a new version of a CDM controlled document. The user is then asked to enter a "Reason for Change" comment (Note. This behavior can be configured via triggers).
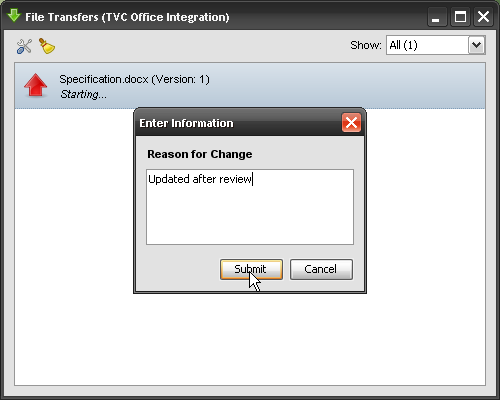
Figure 4. Uploading of a new file version
Once the user has entered a valid "Reason for Change" comment, the file is being uploaded and the progress of the update is shown for the entry. Once that is done, the user can either select to remove the entry, or just keep it (the actual document can be viewed at a later time).
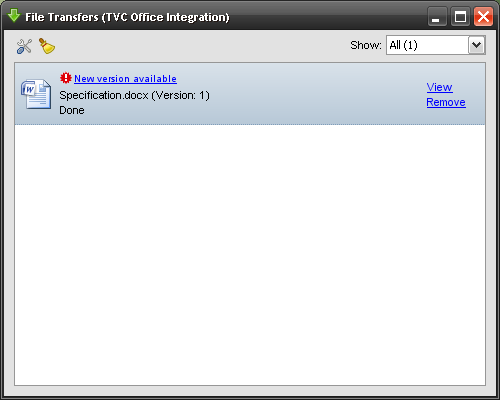
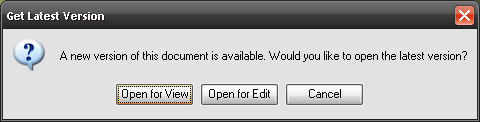
If the file manager has detected that a new version of a file that you have downloaded is available (such as when you just checked in a new version of a file that you edited) it will show a notification. You may click on this notification to download the latest version of the file if you wish. If you do click on it a small popup window will show up asking you if you want to view or edit the latest version (of course, the file manager will not allow you to open the latest version to view or edit it if you don’t have proper access for these operations).
1.3.1. Preferences
The TVC File Manager client allows the user to configure its own preferred behavior. As a user you can select a folder wherein all files should be saved automatically when downloaded. You can also define what should happen if that folder contains a file with the same name as the file being downloaded.
It is also possible to select whether downloaded files should be deleted (moved to the recycle bin) when the entry is removed from the user interface and whether the client should check for new versions of downloaded files. Note that if you want the client to check for new versions it will do so every time you login to the application and every 10 minutes while you’re logged in. Also, the file manager can only check for new versions of downloaded files that follow to the Common Document Model.
Another option that you have as a user is to select whether the integration window should appear when you login to the system. The file manager can be configured to always open the window, only open it if you have active files (e.g. files currently being edited), or to never open it.
The files that are downloaded for view could be placed in a separate temp folder to avoid file name collisions that could occur when comparing document versions.
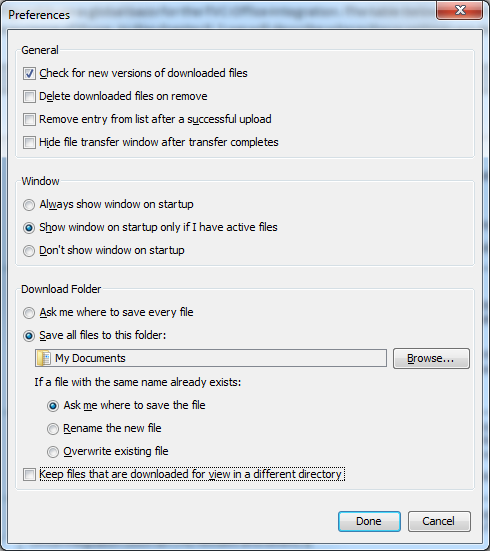
Figure 5. Preferences
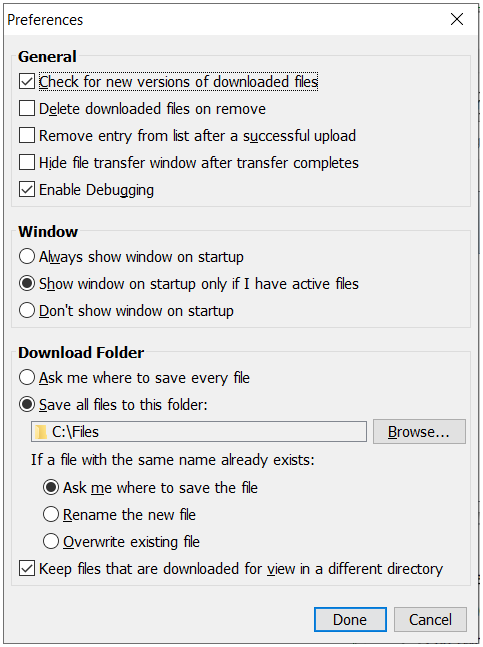
Figure 6. Preferences - Bold section headers | increased font size
1.4. Using Applets
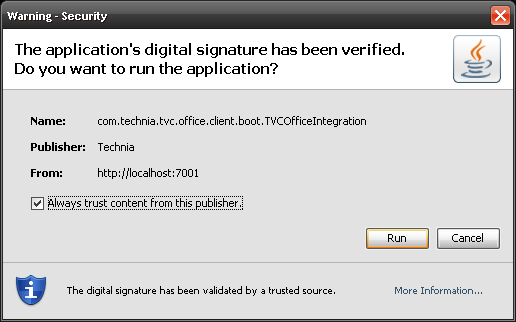
For clients using old legacy browser that only supports running the TVC File Manager as an applet (typically Internet Explorer 11),
When a user uses the application for the first time after the TVC File Manager has been installed, a popup window will be shown (similar as the screenshot below), and the user has to accept the applet in order to use the TVC Office functionality.