12c
TIF 2021.5.0 Release Information
17 December 2021
1. Internal Database Schema Changes
This release contains schema changes of the internal database within TIF.
These changes are applied when starting the TIF server the first time after upgrade to this version. Subsequent startup of TIF are not affected.
|
If your database contains large amount of data, then this first time start-up after upgrading may take a few more minutes than normal. DO NOT ABORT/KILL THE TIF SERVER PROCESS DURING THIS UPGRADE PHASE. THIS MAY CORRUPT YOUR DATABASE. |
2. External Database
Support to use an external database for storage of the TIF data is now supported.
Such external database can either be dedicated per instance or shared among multiple TIF server instances. Sharing an external database also enables to query and see the same data from multiple instances via any TIF Admin UI instance.
Supported databases and applied SQL dialects are listed in the below table. Dialect means the variant of an SQL language and defines the required database version. Dialects are typically compatible with later database versions.
| Database | SQL Dialect |
|---|---|
Oracle |
|
PostgreSQL |
10 |
SQL Server |
2000 |
Database specific drivers are required when using an external database. The TIF server bundle does not contain any vendor drivers due to both licensing issues and the multitude of different versions each DB driver have. For more information, see this document.
Also, some configuration is needed in ${TIF_ROOT}/etc/tif.custom.properties to locate and access the database.
A PostgreSQL example:
db.type = postgresql
db.postgresql.host = myhostname
db.postgresql.port = 5432
db.postgresql.database = databasename
db.postgresql.user = databaseuser
db.postgresql.password = databaseuserpassword
A migration routine have been implemented to support migration of the data from an existing embedded Derby database into the external database. For more information, please read this document.
3. User Accounts
The TIF Administration UI now supports having multiple user accounts.
The internal user-account database is at first startup populated with the admin user / password defined in the properties file. Any sub-sequent changes to this user must be done from the Administration UI.
To disable the new user account database, set the property user.account.db.enabled to false.
Once logged in, you can access the user management as shown below.
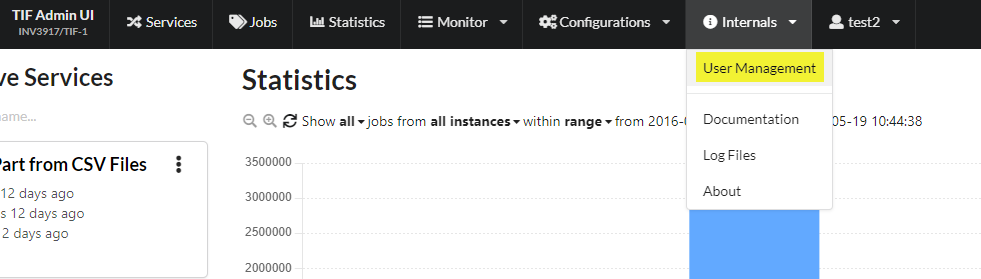
Figure 1. Accessing the user management view
This will give you a list of all user accounts
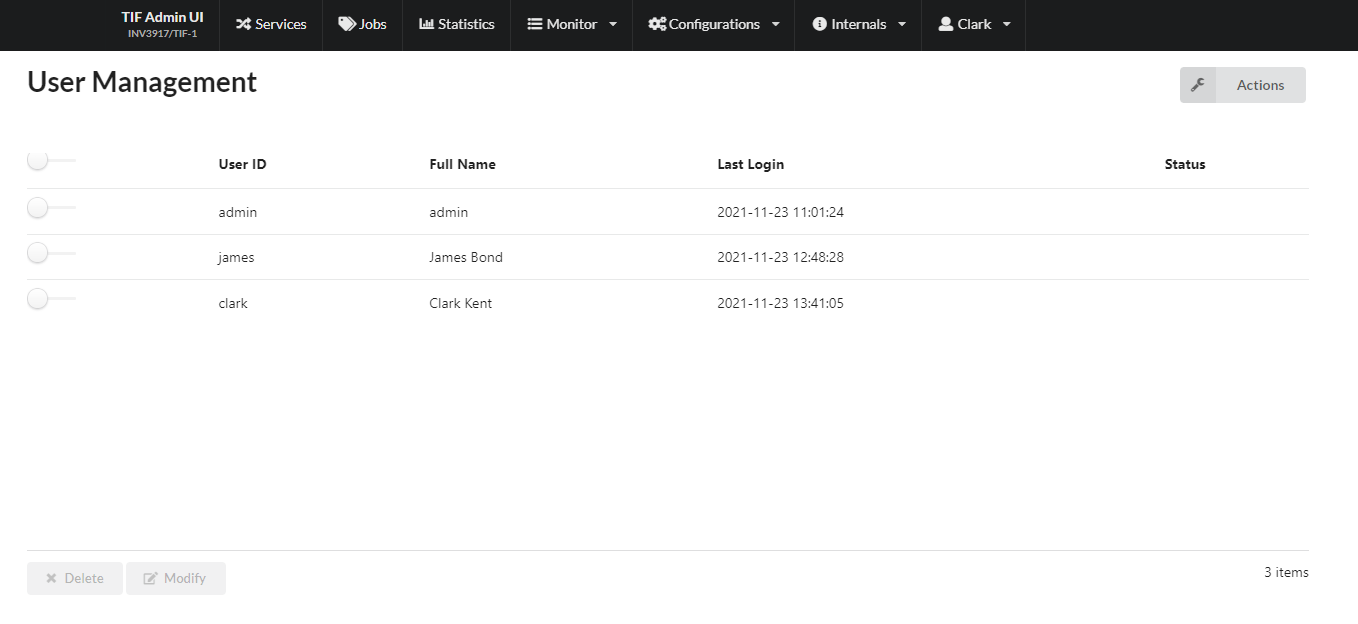
Figure 2. User account list
| These new capabilities of creating users and allow users to request password resets, requires that TIF is configured properly regarding mail settings. If TIF cannot send mails properly, the process of inviting new users will not work correctly. |
4. Token Resolver
When transferring data to an HTTP destination, one can now configure a token resolver that is used to resolve additional tokens to be used in the HTTP request. A typical example of such token would be an Authorization token containing a bearer token value.
This feature allows for example granting access using the OAuth2 client credentials grant flow, but other similar credential flows can be implemented using this new token resolver concept.
The token resolver (or resolvers) are all defined in the ${TIF_HOME}/etc/destinations.xml file among with the destinations.
Below is an example of a defined resolver.
<Destinations>
    <TokenResolver id="keycloak-1" cacheFor="300s">
        <Request url="http://localhost:30180/auth/realms/${job.param.keycloak_realm}/protocol/openid-connect/token">
            <Params> <!-- implies application/x-www-form-urlencoded  + method = POST -->
                <Param name="grant_type" value="client_credentials" />
                <Param name="scope" value="${job.param.keycloak.scopes}" />
                <Param name="client_id" value="tif" />
                <Param name="client_secret" value="${tif.setting.keycloak.tif.secret}" />
            </Params>
        </Request>
        <Response>
            <Json>
                <Map jsonPath="$.access_token" as="access_token" />
                <Map jsonPath="$.token_type" as="token_type" />
            </Json>
        </Response>
        <Tokens>
            <Token name="Authorization" macro="${token_type} ${access_token}" />
        </Tokens>
    </TokenResolver>

    <Http id="http-dest-with-keycloak" tokenResolver="keycloak-1" url="..." />

</Destinations>
Read more in this document.
5. Service Activator Monitoring Agent
TIF has an internal agent monitoring all the services running inside TIF and tries to re-start failed services. This agent has been enhanced as of this release, for example it will not try to start a service forever; instead it will stop the service if the number of start attempts exceeds the configured amount.
You can adjust the agent settings in the tif.properties file available under ${TIF_ROOT}/etc.
6. Enable 3DExperience Tracing within Create/Update Integration
When executing a create/update integration use case, you can enable certain 3DExperience/ENOVIA trace types during its execution.
This can be useful for debugging or troubleshooting purposes.
This is accomplished by the attribute traceTags on the root element in the create update configuration.
Example below:
<CreateConfiguration traceTags="mql,jpo,trigger">
 ...
</CreateConfiguration>| The traceTags are ignored if TIF is running in production mode. |
7. Fixed Bugs
Below is the list of fixed bugs as of this release.
| Issue No | Description |
|---|---|
846 |
Improved error message in Create Update integration when an object is not found |
848 |
Timetable job having a schedule that will never occur in the future causes the scheduler to not-start with an exception. |
849 |
Create/update integration: Text embedded in CDATA blocks not matched correctly in XPath expressions when used from custom code |
854 |
Schema installation failed on 3DExperience version R2021x FD07 |